From www.redheart.com
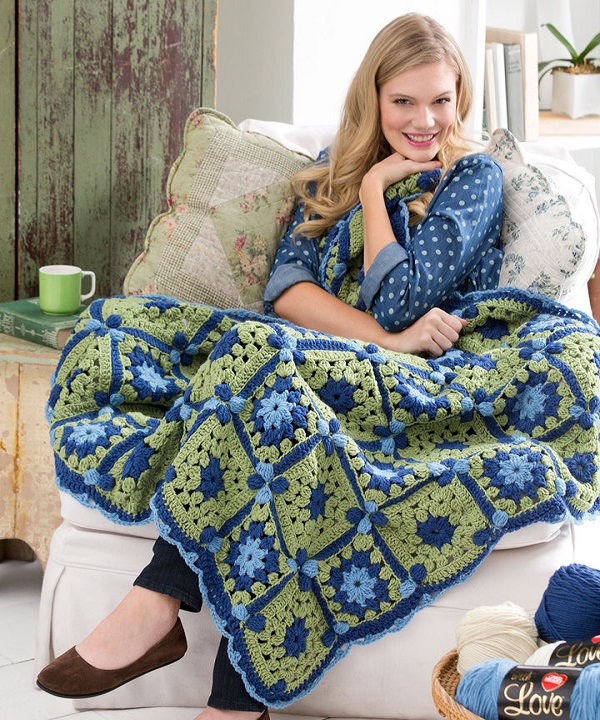
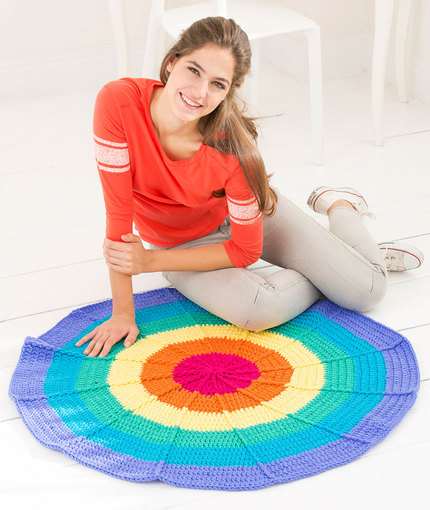
Flower Path Throw
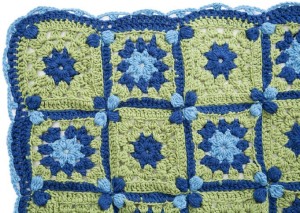
This wonderful throw takes the crocheted granny square throw to a new dimension! The squares feature puff stitches in the corners of the last round, so that when squares are joined there is a flower where the corners meet.
Pattern #: LW3589
Designed by: Terry Day
Project Type: Throws, Afghans, Blankets, Spring
Skill Level: Easy
Required Supplies:
- RED HEART® With Love®: 1 skein of 1805 Bluebell A; 2 skeins of 1814 True Blue B; and 3 skeins of 1601 Lettuce C
- Susan Bates® Crochet Hook: 5.00 mm [US H-8]
- Yarn Needle
GAUGE: Square motif = 6½” (16.5 cm) across. CHECK YOUR GAUGE. Use any size needle to obtain the gauge given.
Throw measures: 41” x 54” (104 x 137 cm)
Special Stitches
Beginning 6-dc puff st (beg puff st): Ch 3, [Yo, draw up a loop in designated space, yarn over, draw through 2 loops on hook] 5 times in same space, yarn over, draw through all 6 loops on hook.
6-dc puff st (puff st): [Yo, draw up a loop in designated space, yarn over, draw through 2 loops on hook] 6 times in same space, yarn over, draw through all 7 loops on hook.
Beginning 3-dc cluster st (beg cluster): Ch 3, [Yo, draw up a loop in designated space, yarn over, draw through 2 loops on hook] twice in same space, yarn over, draw through all 3 loops on hook.
3-dc cluster st (cluster): [Yo, draw up a loop in designated space, yarn over, draw through 2 loops on hook] 3 times in same space, yarn over, draw through all 4 loops on hook.
SQUARE A
(make 24 in the following color sequence):
Row 1: A.
Row 2: B.
Row 3: C.
Row 4: A for puff sts; B for the rest of row.
SQUARE B
(make 24 in the following color sequence):
Row 1: B.
Row 2: C.
Row 3: C.
Row 4: B for puff sts; C for the rest of row.
SQUARE
With Row 1 color, ch 6, join with slip st to form ring.
Round 1 (right side): Work beg cluster in ring, ch 3, [cluster, ch 3] 7 times in ring; join with a slip st in top of beg cluster – 8 clusters; 8 ch-3 spaces. Fasten off.
Round 2: With right side facing, join Round 2 color with a slip st in next ch-3 space, (beg cluster, ch 3, cluster) in same ch-3 space, *ch 3, cluster in next ch 3 space, ch 3**, (cluster, ch 3, cluster) in next ch-3 space; repeat from * around, ending last repeat at **; join with a slip st in top of beg cluster – 12 clusters; 12 ch-3 spaces. Fasten off.
Round 3: With right side facing, join Round 3 color with a slip st in next ch-3 space, (beg cluster, ch 5, cluster) in same ch-3 space, *(ch 3, cluster) in each of next 2 ch-3 spaces, ch 3**, (cluster, ch 5, cluster) in next ch-3 space; repeat from * around, ending last repeat at **, join with a slip st in top of beg cluster – 16 clusters; 12 ch-3 spaces; 4 ch-5 spaces. Fasten off.
Note: Next round is worked alternating between 2 colors throughout. Carry unused color across tops of sts and work over strand with current color.
Round 4: With right side facing, join puff sts color with a slip st in next ch-5 space, beg puff st in same ch-5 space, ch 1, *change to alternate color, [dc in back loop only of next cluster, dc in each of next 3 ch sts] 3 times, dc in back loop only of next cluster**, change back to puff st color, puff st in next ch-5 space, ch 1, change back to alternate color; repeat from * around, ending last repeat at **; join with a slip st in beg puff st – 4 puff sts; 52 dc. Fasten off.
Press squares with warm steam iron blocking into shape placing double thickness of cloth between iron and square being very careful not to flatten out puff sts.
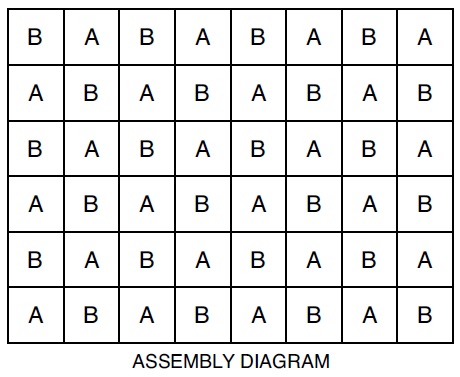
ASSEMBLY
Working in back loops only, whipstitch squares together following Assembly Diagram.
BORDER
Round 1: With right side facing, join B with a slip st in ch-1 st of one corner puff st, ch 3, 2 dc in same st (corner made), *dc in each st across to next corner**, 3 dc in corner puff st; repeat from * around, ending last repeat at **; join with slip st to top of beginning ch-3. Fasten off B.
Round 2: With right side facing, join A with a slip st in center dc of any corner, ch 3, dc in same st, *ch 3, skip next 2 dc, slip st in next dc, ch 3, skip next 2 dc**, 2 dc in next dc; repeat from * around, ending last repeat at **, (adjusting pattern if necessary so that repeat ends in the right place); join with a slip st in top of beg ch-3. Fasten off.
ABBREVIATIONS
A, B, C = color A, B, C; ch = chain; dc = double crochet; st(s) = stitch(es); ( ) = work directions in parentheses into same st; [ ] = work directions in brackets the number of times specified; * = repeat whatever follows the * as indicated.
Be sure to…
Visit my Website
Join me on Facebook
Subscribe to the Maggie Weldon YouTube Channel for more crochet lesson videos
Subscribe to Maggie’s Crochet YouTube Channel for product reviews
Sign Up for My Newsletter
Follow us on Pinterest
Follow us on Twitter
No Comments